By Les Lonsdale
[This is a 2-part article, the 1st part dealing with theory and general information, as well as branch grafting. Part 2 will cover bud grafting, root grafting, and layering techniques.]
Most of the information is from the Pennsylvania State University Horticulture Correspondence Course #11 and #86, as well as from notes taken in a workshop presented by Katheryn Taylor from the Dept. of Agriculture, University of Georgia, presented at the Bainbridge public library on 2/10/05.
Some useful terms:
● Scion – top part of graft
● Stock – bottom part with root which receives the scion
● Herbaceous – non-woody perennials or annuals
● Dicots – flower and seed-bearing plants/trees that sprout with 2 leaves
● Monocots – grasses, bamboo, palms, etc.; only one seed leaf
● Phloem – the green layer just below the bark. Transports food and growth factors from leaves down to rest of tree. (see diagram #1)
● Cambium – creamy white active growth layer between phloem and xylem
● Xylem – inner woody layer that transports water and minerals from roots up to rest of tree
● Nebari – base of tree and exposed surface roots
Reasons for grafting and layering
In the world of horticulture, there exist many reasons for grafting and layering plants and trees such as: propagation of plants that do not start well from seeds or cuttings; to increase vigor by grafting onto hardier stock; for dwarfing fruit; to increase resistance to cold; etc. etc.
In bonsai, however, our primary interest is to introduce branches or surface roots where there are none, in order to enhance the appearance of the tree, or to quickly propagate a new tree from an existing one without having to start from a seed or small cutting. Sometimes we might want to raise the base of a tree and create a new nebari higher on the trunk. All of this and more can be accomplished through grafting and/or layering techniques.
The SECRET to success in ALL types of grafting: the cambium’s of both scion and stock MUST meet! Also, the graft MUST be sealed and kept from drying out until the graft takes.
Materials needed:
● Sharp razor blade or knife
● Grafting tape, or raffia, or wide rubber band
● Pruning seal or wax
General information on grafting
Unless otherwise specified, all grafting is best accomplished in late Spring or early Summer when the sap is moving, also known as when the ‘bark slips’, that is, when the outer bark is easily peeled away from the cambium. (The exception is thread grafting – see below)
The scion can either be taken from healthy greenwood with at least 2 dormant buds from the current season’s growth, or from hardwood that is 1 to 2 years old. (Dormant buds do not break as easily on older wood.) Scions should be cut the Winter before the grafting, while dormant and should be kept damp, but not wet. They should be dormant when grafted, though the stock may be actively growing.
The stock should be healthy and well established and should not be root pruned the same growing season as the grafting, nor for at least one year after grafting.
Grafts performed before June may ‘take’ before the Fall. Grafts performed in July or later probably won’t ‘take’ until the following year.
After grafting, begin fertilizing with a fertilizer with high potassium (K) level.
When first learning how to graft, it is perhaps best to practice on yard trees before you attempt to graft a prized bonsai, because a wrongly executed graft is likely to produce an ugly scar that may ruin the appearance of your tree.
The following is a brief description. For more detail on each particular graft, google it.
Branch Grafting
There are many types of grafts including Saddle, Inlay, Veneer, Tongue (or Whip), Bark, Bridge, etc. But I have chosen to only discuss the ones that would be most beneficial to bonsai growers – the Cleft, Approach, Side, and Thread grafts.
1) Cleft graft: To start a new leader in order to achieve taper where there is none, or for any other reason that a new top
is desired. Start on each side of the stock. If both survive, remove one.
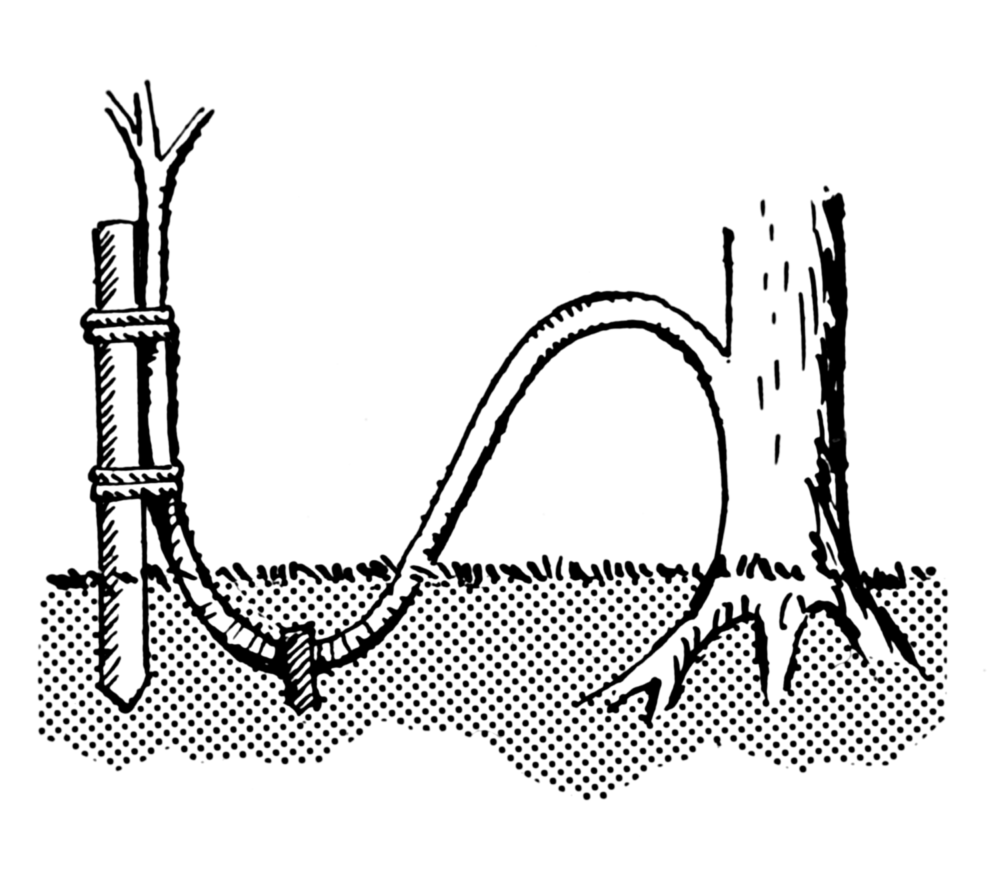
2) Approach graft: To create a new limb or surface root (covered in pt.2). Perform from late Spring – June.
3) Thread graft: To create a new limb – more reliable than approach graft. Perform in early Spring just before bud
break. Another time option is late May after defoliation of the branch to be threaded. Remove all other buds on the other
side of the branch, thus encouraging growth only on the portion projecting from the trunk. Seal both entrance and exit holes with putty-type sealer. Do not prune new growth, but let grow freely until the hole is filled – 1 to 2 years, then cut back and
train.
Tip: For thread grafts in general, it is recommended that you begin drilling on the side of the trunk where the new graft will emerge since the entry hole is sometimes cleaner than the exit hole, when drilling. Another tip is that whenever possible, position the side of the graft that will be cut off later, to the rear of the tree, or out of the viewing site.
4) Side graft: To create a new limb – larger limbs can be created than with thread graft. Perform: Conifers –early Spring
– June; Deciduous – June – Sept.
[NOTE: Evergreens must be enclosed with a transparent bag around the scion in order to maintain high humidity, and to prevent wilting and drying out of the scion before the graft has taken.]
(continued in part 2)


